When my older son was 3 months old, I started taking him to Jo Jingles classes. They are music and movement classes for babies and children up to the age when they start school. He loved it! He stayed in classes until he started school when he turned 4.
After that, his little brother took over. He'd been tagging along to his big brother's classes since he was only a couple of weeks old and he's now three and a half and loves his Jo Jingles classes.
The same teacher, Gill, has been teaching both of them throughout. She's very enthusiastic and upbeat and all the kids love her. We have another year before my little one starts school and I had hoped to keep him in her classes until then, but this week Gill announced that, for personal reasons, she will be handing the classes in our area over to another teacher.
We will miss Gill and I wanted to make her a small gift as a token of our family's appreciation but didn't know what. Also, her departure has been announced at relatively short notice so I needed something quick.
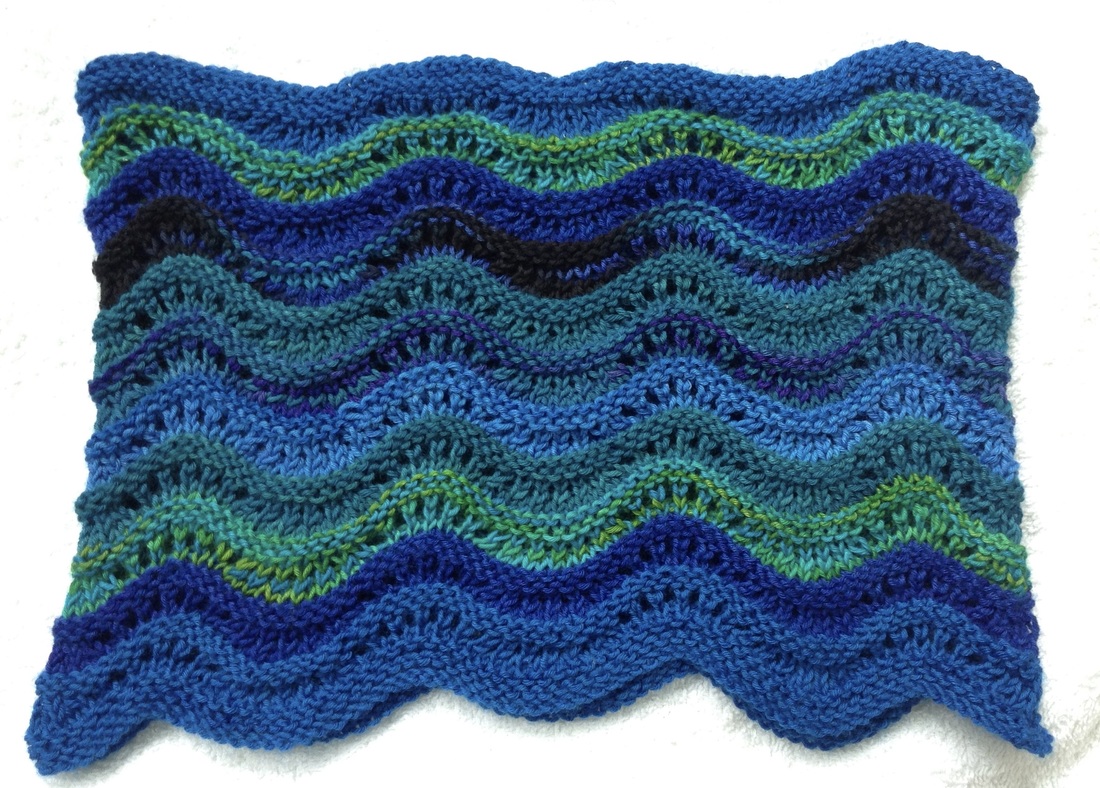
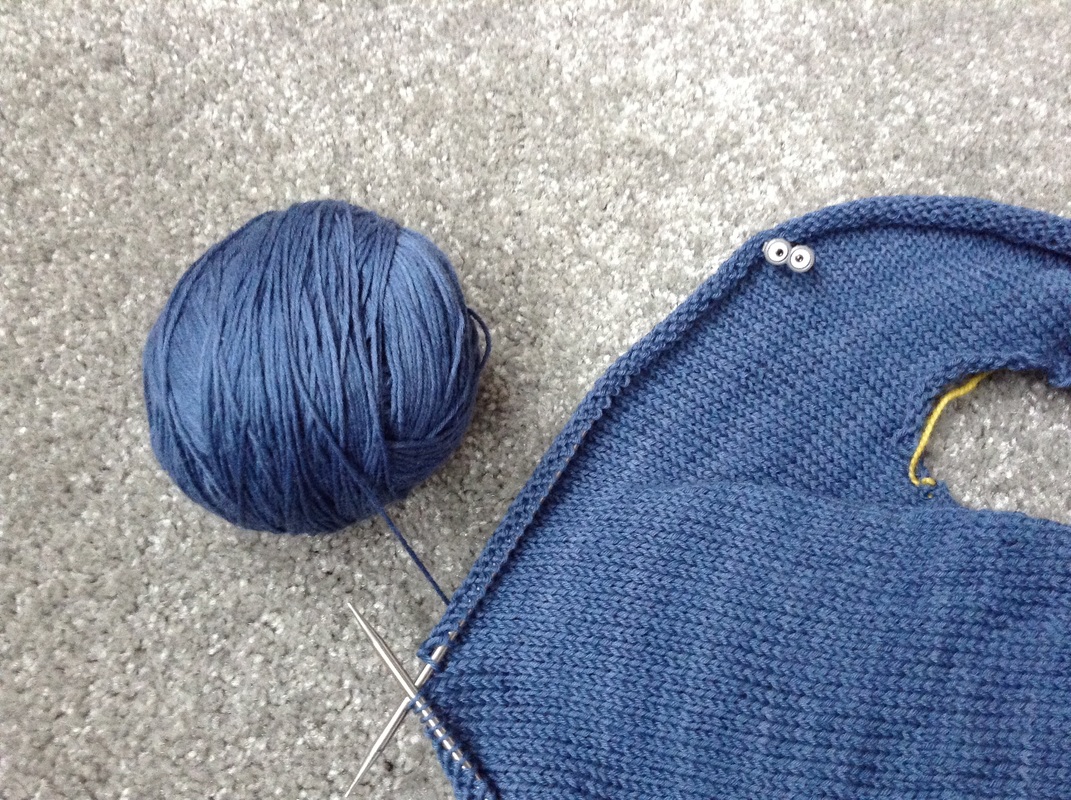
As always, I asked on Ravelry for ideas. Some patterns were suggested but they weren't quite right. Some people suggested, since I have a lot of different blue yarns in my stash, maybe a stashbuster project of some type might be suitable. Some very kind fellow designers even offered me copies of their own patterns. I tried browsing patterns in my "favourites" list, and one of them was a flat scarf in a gradient yarn in a very simple Old Shale pattern. I liked the effect of the stitch with the yarn but a flat scarf wasn't quite what I had in mind. Then I pictured a ripple cowl, using the Old Shale pattern but in stripes of each of my blue yarns.
You will notice this isn't the traditional Old Shale pattern. It has extra rows both before and after the eyelet-and-decreases row to make the ridges a little deeper and more pronounced. I hope you like it, and more importantly I hope Gill does too!
Ripples for Gill
You will need 3.5mm (US4) knitting needles for working in the round. If using a circular needle, I suggest a 16" cable.
The cowl is worked in fingering weight yarn. Yarn requirements will depend on how many stripes you want to make, but allow about 30 yards of yarn for each individual 6-round repeat, plus about another 10 yards each for the starting and finishing borders. I used just over 200 yards in total, using seven different colours and making ten stripes. This makes a finished cowl of about 20" in diameter and about 7" high, with each 18 st/6 row ripple pattern repeat measuring 2 3/4" across and 1/2" tall.
K - knit
P - purl
YO - yarn over
K2tog - knit two stitches together
Rpt - repeat
St/s - stitch/es
Cast on 144 sts and join to work in the round, taking care not to twist.
Starting border round 1: K all sts
Starting border round 2: P all sts
Starting border round 3-6: Rpt rounds 1 and 2 twice more
Ripple section:
Round 1: K all sts
Round 2: K all sts
Round 3: *K2tog three times, (YO, K1) six times, K2tog three times; rpt from * to end of round
Round 4: K all sts
Round 5: P all sts
Round 6: P all sts
Rpt these six rounds as many times as you wish, changing colours at the end of each six-round repeat if desired. When your cowl has reached the desired height, work the finishing border in the colour currently in use.
Finishing border round 1: K all sts
Finishing border round 2: P all sts
Finishing border round 3: K all sts
Cast off loosely knitwise.
To finish: Weave in ends to secure any loose ends at colour changes. Wash your work according to the yarn manufacturer instructions. Squeeze (don't wring) out excess water and lay flat to dry. If necessary, hide any yarn ends not dealt with at the earlier weaving-in stage. Wear and enjoy!
After that, his little brother took over. He'd been tagging along to his big brother's classes since he was only a couple of weeks old and he's now three and a half and loves his Jo Jingles classes.
The same teacher, Gill, has been teaching both of them throughout. She's very enthusiastic and upbeat and all the kids love her. We have another year before my little one starts school and I had hoped to keep him in her classes until then, but this week Gill announced that, for personal reasons, she will be handing the classes in our area over to another teacher.
We will miss Gill and I wanted to make her a small gift as a token of our family's appreciation but didn't know what. Also, her departure has been announced at relatively short notice so I needed something quick.
As always, I asked on Ravelry for ideas. Some patterns were suggested but they weren't quite right. Some people suggested, since I have a lot of different blue yarns in my stash, maybe a stashbuster project of some type might be suitable. Some very kind fellow designers even offered me copies of their own patterns. I tried browsing patterns in my "favourites" list, and one of them was a flat scarf in a gradient yarn in a very simple Old Shale pattern. I liked the effect of the stitch with the yarn but a flat scarf wasn't quite what I had in mind. Then I pictured a ripple cowl, using the Old Shale pattern but in stripes of each of my blue yarns.
You will notice this isn't the traditional Old Shale pattern. It has extra rows both before and after the eyelet-and-decreases row to make the ridges a little deeper and more pronounced. I hope you like it, and more importantly I hope Gill does too!
Ripples for Gill
You will need 3.5mm (US4) knitting needles for working in the round. If using a circular needle, I suggest a 16" cable.
The cowl is worked in fingering weight yarn. Yarn requirements will depend on how many stripes you want to make, but allow about 30 yards of yarn for each individual 6-round repeat, plus about another 10 yards each for the starting and finishing borders. I used just over 200 yards in total, using seven different colours and making ten stripes. This makes a finished cowl of about 20" in diameter and about 7" high, with each 18 st/6 row ripple pattern repeat measuring 2 3/4" across and 1/2" tall.
K - knit
P - purl
YO - yarn over
K2tog - knit two stitches together
Rpt - repeat
St/s - stitch/es
Cast on 144 sts and join to work in the round, taking care not to twist.
Starting border round 1: K all sts
Starting border round 2: P all sts
Starting border round 3-6: Rpt rounds 1 and 2 twice more
Ripple section:
Round 1: K all sts
Round 2: K all sts
Round 3: *K2tog three times, (YO, K1) six times, K2tog three times; rpt from * to end of round
Round 4: K all sts
Round 5: P all sts
Round 6: P all sts
Rpt these six rounds as many times as you wish, changing colours at the end of each six-round repeat if desired. When your cowl has reached the desired height, work the finishing border in the colour currently in use.
Finishing border round 1: K all sts
Finishing border round 2: P all sts
Finishing border round 3: K all sts
Cast off loosely knitwise.
To finish: Weave in ends to secure any loose ends at colour changes. Wash your work according to the yarn manufacturer instructions. Squeeze (don't wring) out excess water and lay flat to dry. If necessary, hide any yarn ends not dealt with at the earlier weaving-in stage. Wear and enjoy!

 RSS Feed
