I have been designing a hat. OK, I concede that is not anything new, but for this one I wanted a particular look and that required learning a new cast-on. The hat was designed for some yarn I had hand spun on a drop spindle, and I had deliberately spun the yarn to be thick, chunky weight and squishy so I wanted an overall soft and squishy look to the hat too.
A cast-on edge can sometimes look and feel a bit tight but a tubular cast-on has a natural rolled edge which fit the look I wanted for this hat. I had never worked one in the round in 2x2 rib before, and couldn't find a single online tutorial for the exact effect I wanted. A mash-up of several different ones resulted in the following. The pattern will link to this tutorial once it is ready, but meanwhile, I hope this step-by-step photo guide helps in your own hat knitting.
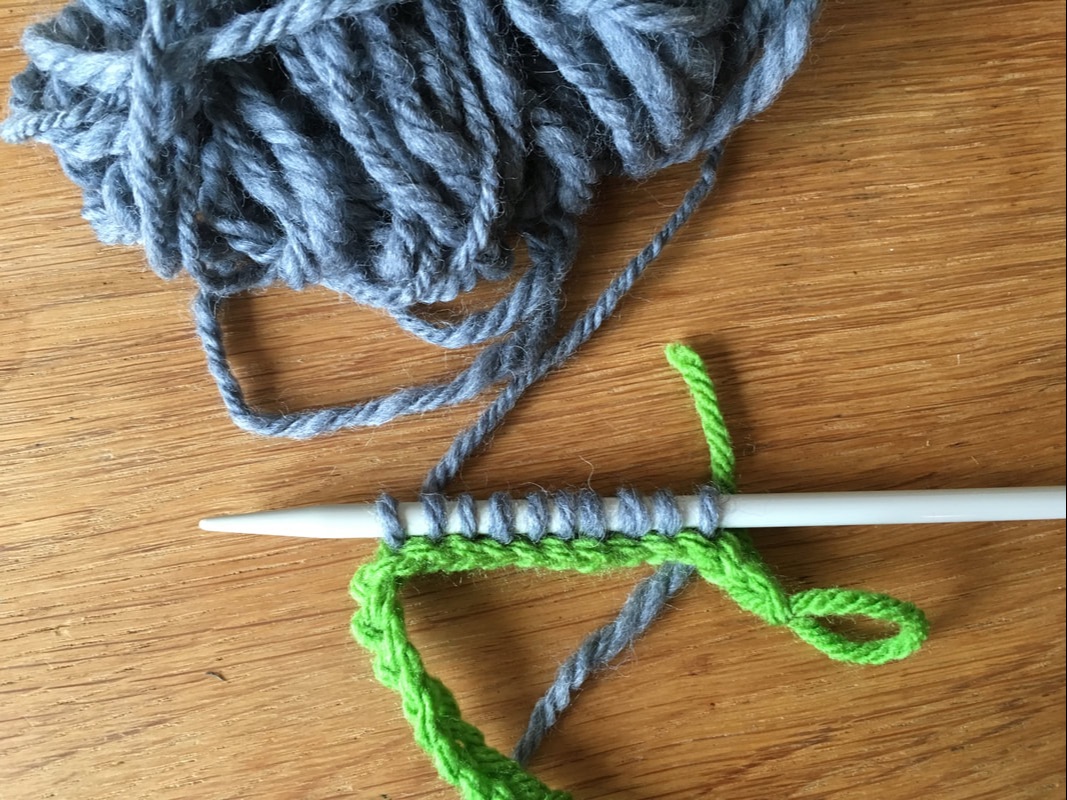
This tubular cast-on begins with a crochet chain provisional cast-on. For the purposes of this tutorial I am working with a 20-stitch tubular cast-on as an example. Obviously a hat for an adult will require substantially more than that! The tubular cast-on starts with only half the final number of stitches, and the remaining half will catch us up later on. Confusing, I know, but trust me, it works.
Since I want a final total of 20 stitches, I begin by casting on 10 (half of 20). To begin, use waste yarn to make a crochet chain around 6 chains longer than the number of stitches you are going to cast on.
A cast-on edge can sometimes look and feel a bit tight but a tubular cast-on has a natural rolled edge which fit the look I wanted for this hat. I had never worked one in the round in 2x2 rib before, and couldn't find a single online tutorial for the exact effect I wanted. A mash-up of several different ones resulted in the following. The pattern will link to this tutorial once it is ready, but meanwhile, I hope this step-by-step photo guide helps in your own hat knitting.
This tubular cast-on begins with a crochet chain provisional cast-on. For the purposes of this tutorial I am working with a 20-stitch tubular cast-on as an example. Obviously a hat for an adult will require substantially more than that! The tubular cast-on starts with only half the final number of stitches, and the remaining half will catch us up later on. Confusing, I know, but trust me, it works.
Since I want a final total of 20 stitches, I begin by casting on 10 (half of 20). To begin, use waste yarn to make a crochet chain around 6 chains longer than the number of stitches you are going to cast on.

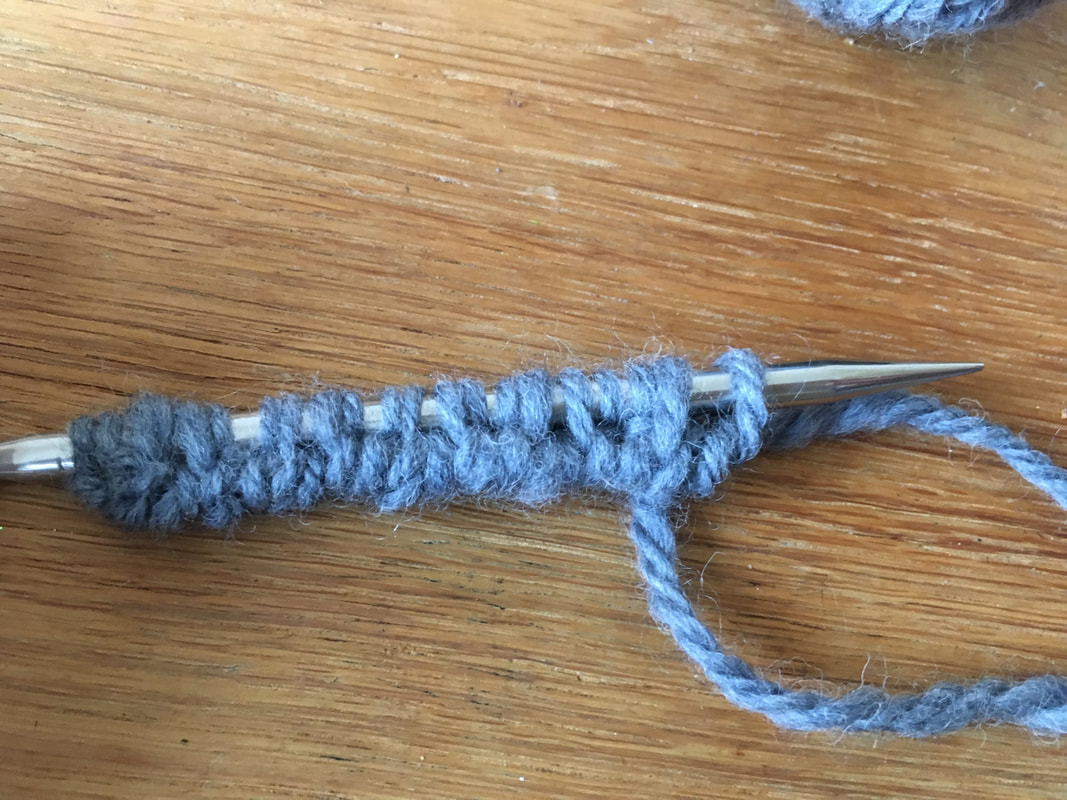
Make sure to leave a cast-on tail about 8"/20cm long - you will need it later. Working into the bumps on the back of the chain (and not into the chain loops themselves), pick up and knit 10 stitches using the working yarn. This will become the first Right Side row.
Purl one row, then knit one row, then purl one row (or in short, work 3 more rows in stocking stitch). It will now look like this:
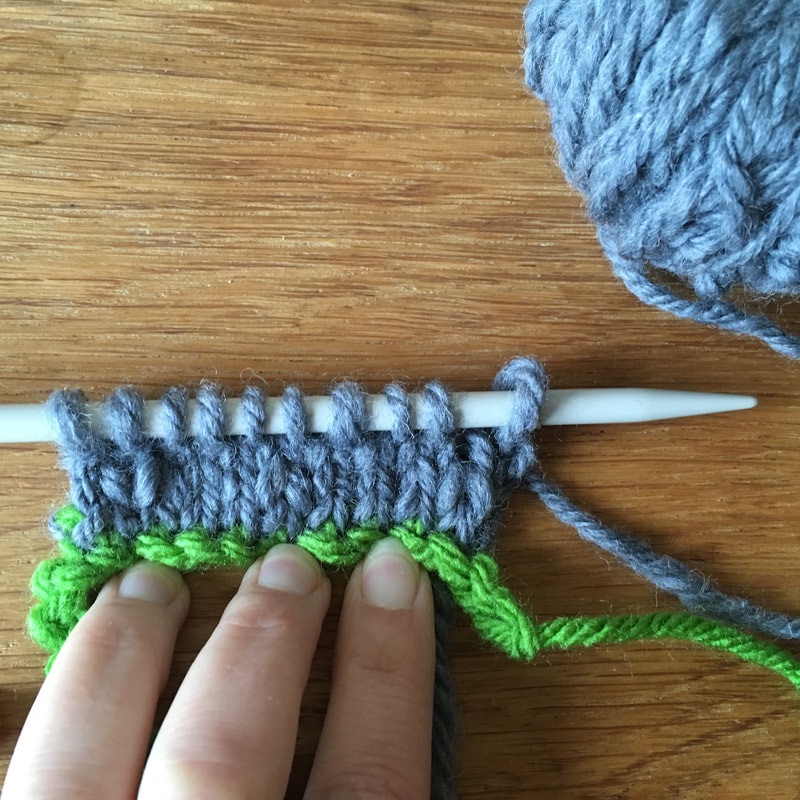
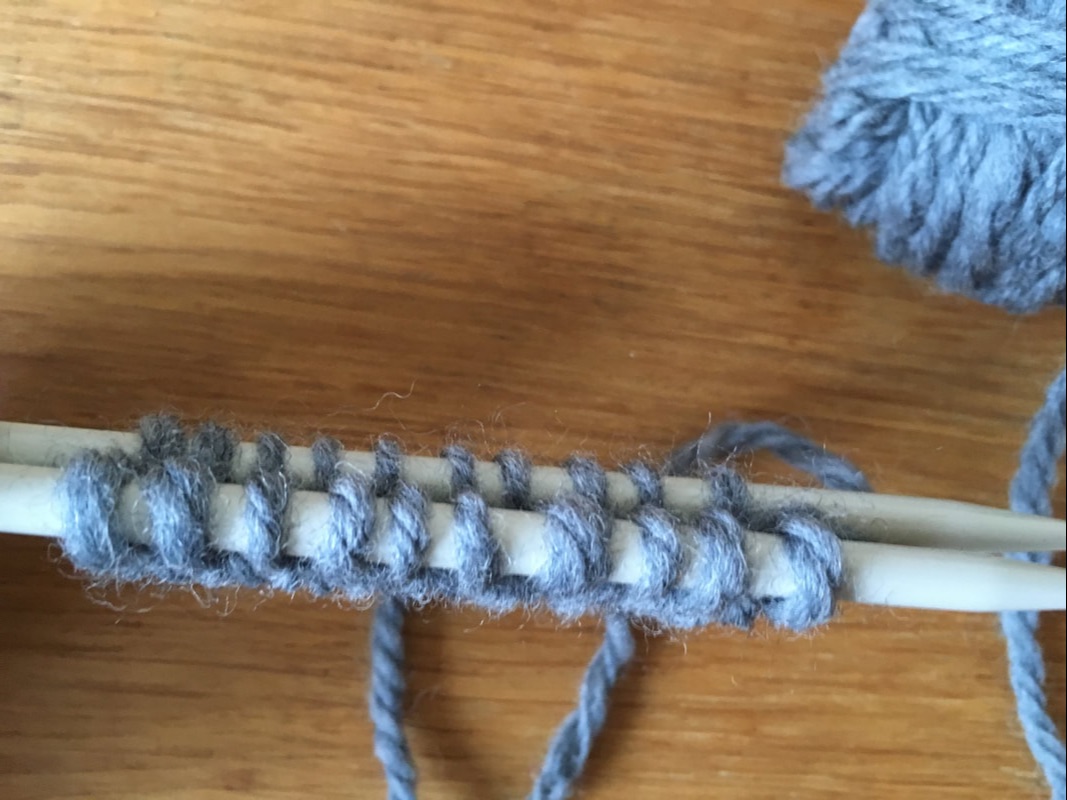
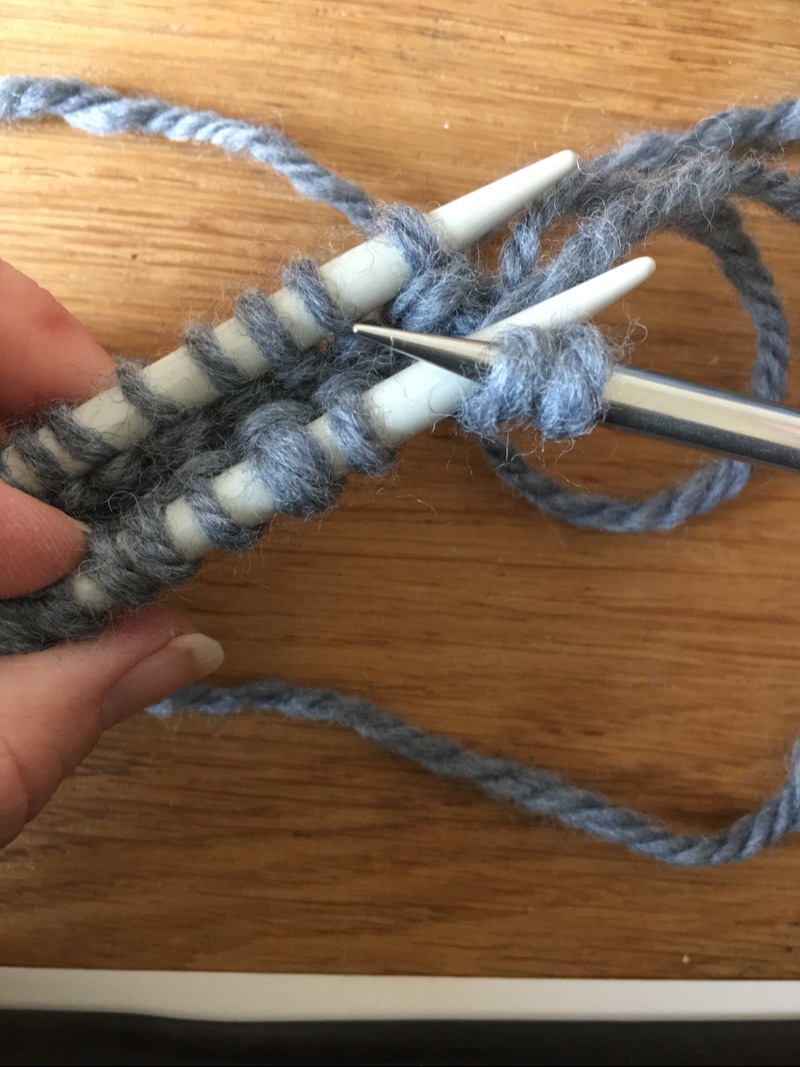
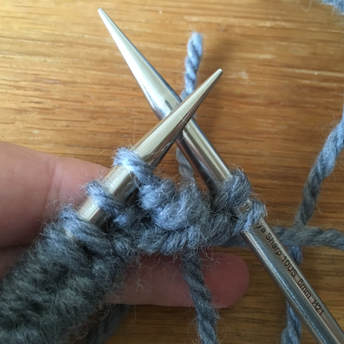
The next thing we need to do is remove the waste yarn and pick up the stitches from them. Carefully unpick the crochet chain, releasing the knit stitches attached to them one by one and pick them up on a second needle. If possible, try to start from the left hand side so your needles end up facing in the same direction. (If you end up with them pointing in opposite directions you will need to use another needle to help you turn the lower edge row around, as you need to end up with two lots of 10 stitches, one above and one below, like this.) Be careful with the number of stitches coming off the crochet chain. Because a crochet chain cast-on causes your first row to be half a stitch out of alignment, it is easy to accidentally pick up one too many or too few. Make sure you have the same number of stitches on each needle (In this example, that's 10 each top and bottom)
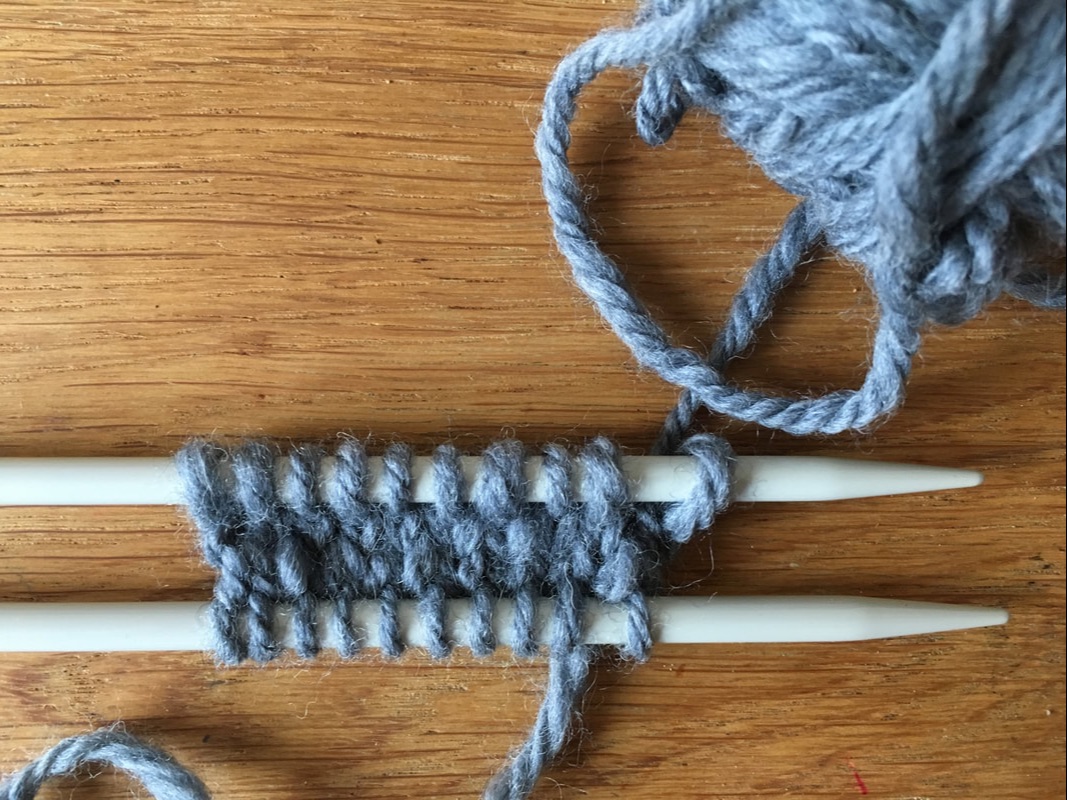
Now hold the two needles so that they are side by side, as if you were going to work a three-needle cast-off. Hold the one that was uppermost just now in front, and the lower one behind so the right side of the stitches are facing outwards.
Now hold these two needles together in your left hand and take the circular needle you are going to work the brim of your hat with in your right hand. You are going to slip all the stitches on to that new working needle, in the right order, to form the 2x2 rib.
To start, slip the first two stitches from the front needle (the one closest to you in your left hand) purl wise on to the new needle. (You can slip them together or one by one, that doesn't matter, just as long as its the first two stitches from the front needle)
To start, slip the first two stitches from the front needle (the one closest to you in your left hand) purl wise on to the new needle. (You can slip them together or one by one, that doesn't matter, just as long as its the first two stitches from the front needle)
Next slip the first two stitches from the back needle purl wise on to the new working needle.

Now go back to the front needle again and slip the next two stitches purl wise on to the new needle.
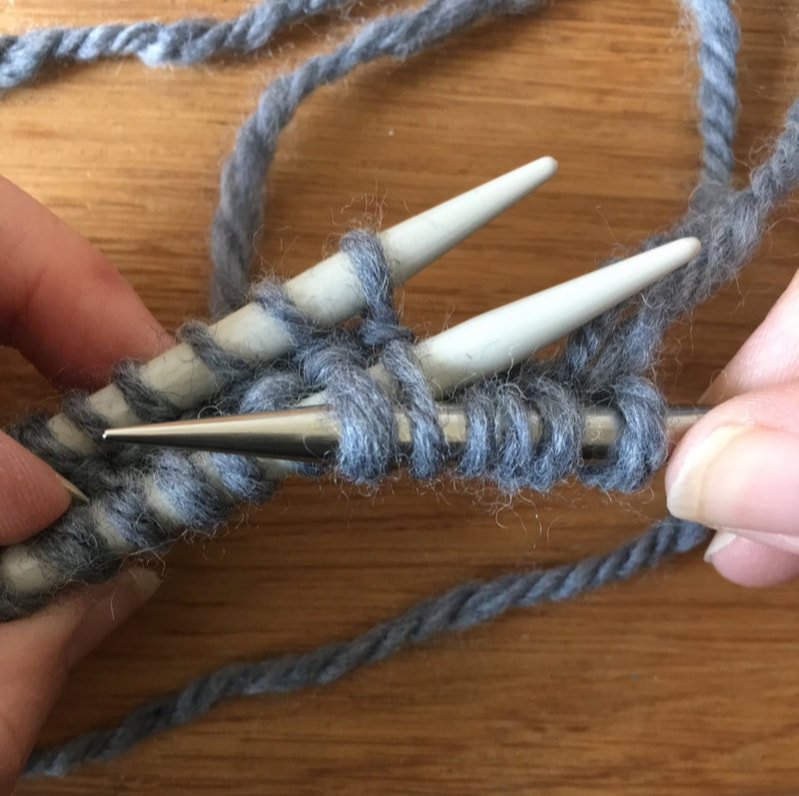
And then take the next two from the back needle. Because the backs of the stitches on the back needle are facing you, they have the appearance of purl stitches, even though you knitted them. This is how the 2x2 rib pattern forms.
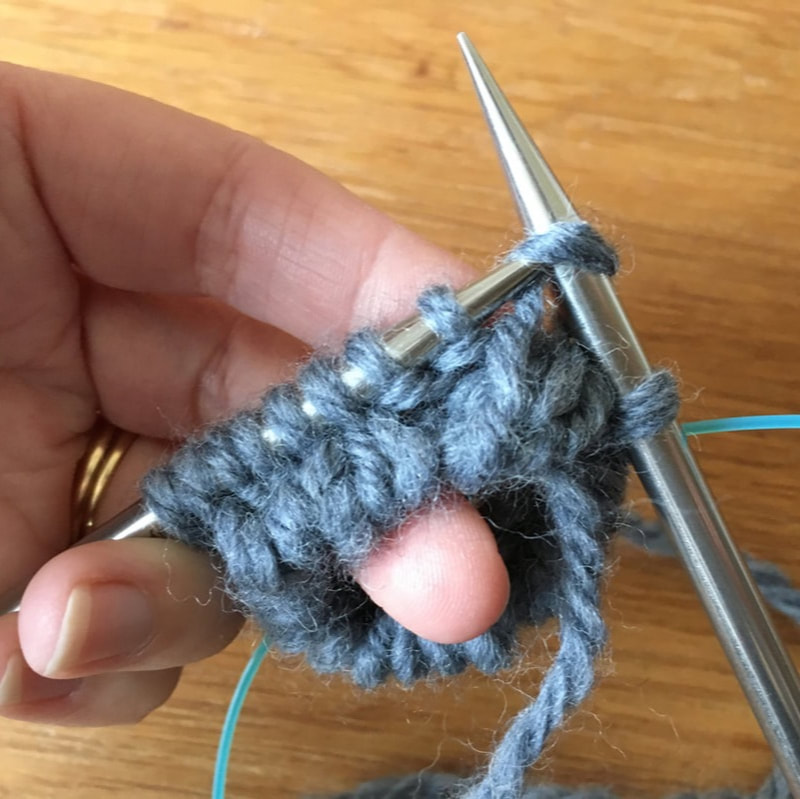
Keep going in this way, slipping two stitches from the front needle, two from the back, two from the front, two from the back, on to your new working needle until all the stitches have been taken over on to the working needle.
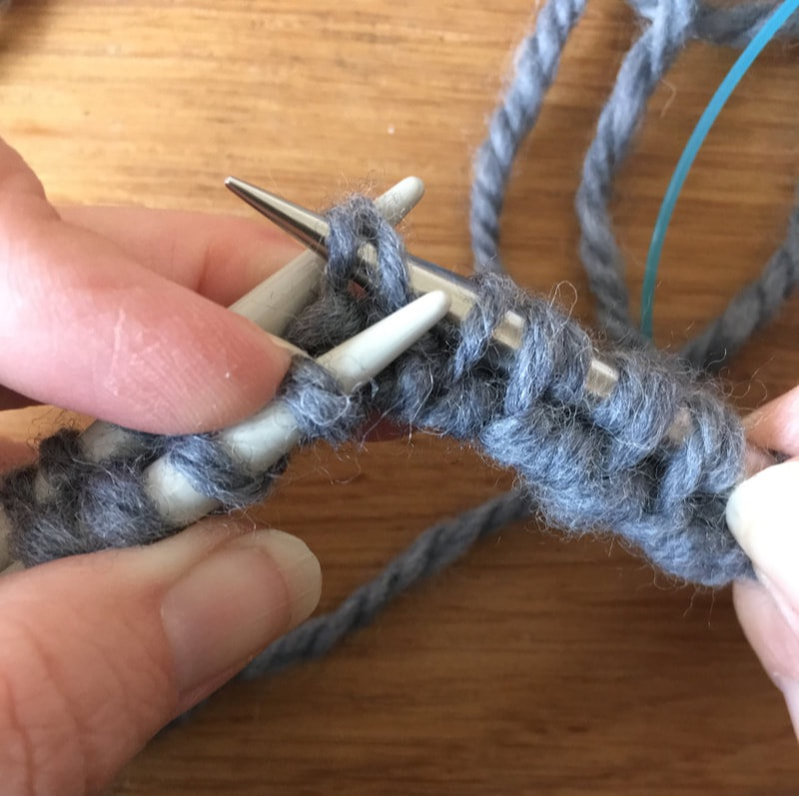
I now have all 20 stitches together on the one needle and am ready to carry on. (Of course, for a full size hat you would have far more stitches than this, which will make the next bit easier. Assuming you are using a 16-20" circular needle, the stitches would fill the cable so pretend there are more stitches on mine too)
As you can see in the photo above, the working yarn is now at the right hand end of the work, but the needle tip is at the left. It is an easy job to just slide the stitches along the cable to the other needle tip so that they are ready to knit, and your working yarn will be at the correct place for you to carry on.
As you can see in the photo above, the working yarn is now at the right hand end of the work, but the needle tip is at the left. It is an easy job to just slide the stitches along the cable to the other needle tip so that they are ready to knit, and your working yarn will be at the correct place for you to carry on.
Bring the other needle tip around and start working in 2x2 rib, knit two, purl two. The stitches will be orientated such that they already appear to form 2x2 rib so just continue in the pattern as set.
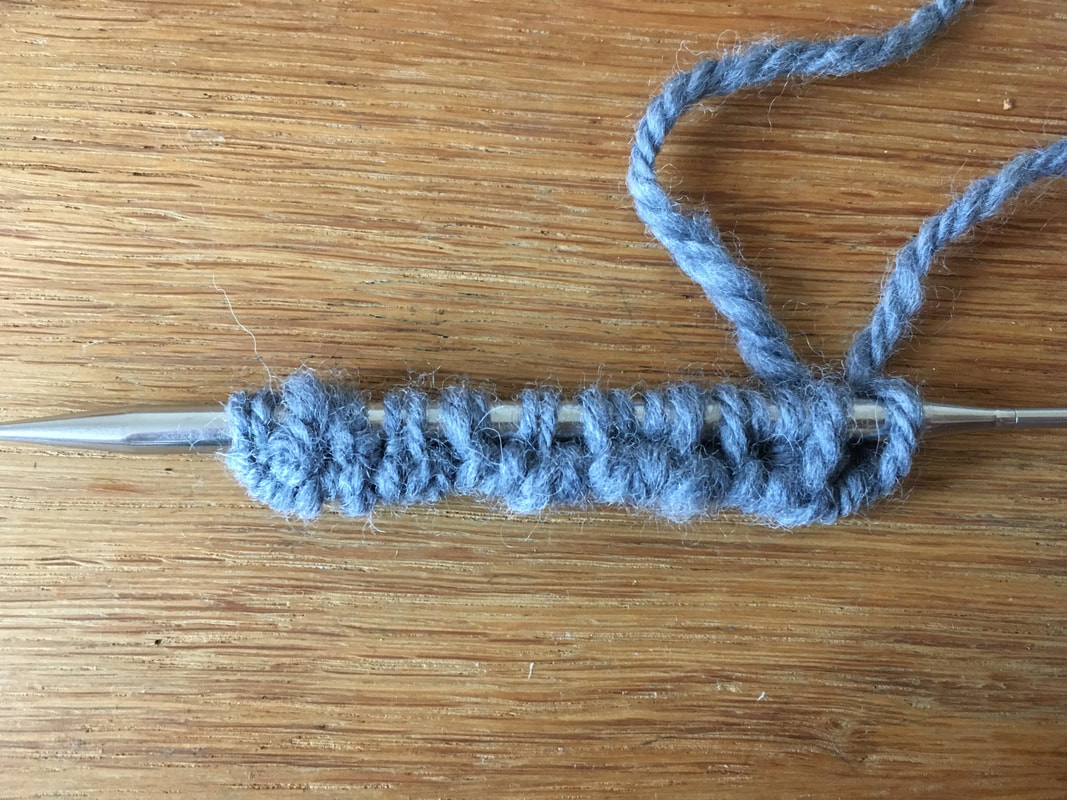
When you get to the end of the first row, do not turn but join to work in the round. Place a marker if you wish to mark the end of the round, but there is no need to cross stitches or knit two stitches together to close the round. This tubular cast-on will naturally have a small gap in it (formed by the folded stocking stitch beginning). Use the cast-on tail to carefully seam the gap closed from the inside when the hat is completed.
This is one way of starting a hat with a 2x2 rib using a stretchy tubular cast-on.
 RSS Feed
